R U Curious?
Are you curious? Most people - and nearly all kids - are, especially when given a little encouragement! Finding answers to all of life's "whys," and the observations that lead to these questions, is what science is all about! Explore and celebrate the ordinary wonders of everyday science with these hands-on programs.
Are you curious? Most people - and nearly all kids - are, especially when given a little encouragement! Finding answers to all of life's "whys," and the observations that lead to these questions, is what science is all about! Explore and celebrate the ordinary wonders of everyday science with these hands-on programs.
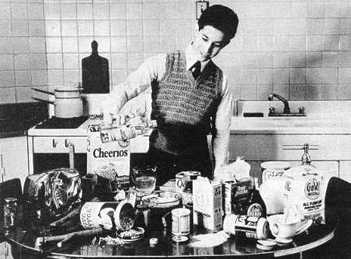
Kitchen Science: Play With Your Food
*Make Ice Cream in a Baggie
*Explore Color Science with Grape Juice
*Fizzy Water
*Test Your Tongue: Are Strawberries Sweet or Sour?
*Oobleck: Solid or Liquid?
*Make Marbleized Paper
*Pop Rocks Expander
The kids at my library didn't really like the experiments outlined in the manual, but they thought these sounded pretty fun!
Food Challenge (Adapted from the Coke and Pepsi Challenge in the Fizz! Boom! Pop! chapter.)
Come up with several products to pit against each other. You could use Store Brands vs. National Brands, or competing products, like Coke and Pepsi, or a mix of both. Where applicable, completely cover the labels on each product, or place each product in a separate container, so no hit is given as to which product is which. Label each competing set of products A and B. (ie: Chip A and Chip B, Soda A and Soda B, etc.) For liquids, label some small Dixie cups with A and B and for solids, label some napkins or small plates. Put a small amount of each product on or in its coordinating container. Invite participants to taste each to compare. Ask which they prefer for each and keep track. Also, ask if they can tell which product is which. At the end of the program, after everyone has tasted, tally the results and share them with the group. Can you really tell Store Brands from National Brands? Could you tell which was Coke and which was Pepsi? What did the group prefer?
Activity: Make Your Own Soda (From the Fizz! Boom! Pop! chapter.)
What You Need
What You Do
*Make Ice Cream in a Baggie
*Explore Color Science with Grape Juice
*Fizzy Water
*Test Your Tongue: Are Strawberries Sweet or Sour?
*Oobleck: Solid or Liquid?
*Make Marbleized Paper
*Pop Rocks Expander
The kids at my library didn't really like the experiments outlined in the manual, but they thought these sounded pretty fun!
Food Challenge (Adapted from the Coke and Pepsi Challenge in the Fizz! Boom! Pop! chapter.)
Come up with several products to pit against each other. You could use Store Brands vs. National Brands, or competing products, like Coke and Pepsi, or a mix of both. Where applicable, completely cover the labels on each product, or place each product in a separate container, so no hit is given as to which product is which. Label each competing set of products A and B. (ie: Chip A and Chip B, Soda A and Soda B, etc.) For liquids, label some small Dixie cups with A and B and for solids, label some napkins or small plates. Put a small amount of each product on or in its coordinating container. Invite participants to taste each to compare. Ask which they prefer for each and keep track. Also, ask if they can tell which product is which. At the end of the program, after everyone has tasted, tally the results and share them with the group. Can you really tell Store Brands from National Brands? Could you tell which was Coke and which was Pepsi? What did the group prefer?
Activity: Make Your Own Soda (From the Fizz! Boom! Pop! chapter.)
What You Need
- Dixie Cups
- Seltzer Water
- Juices, cola syrup, chocolate syrup, extracts (almond, orange, etc)
- Eye Droppers
What You Do
- Make cola syrup ahead of time.
- Invite participants to mix their own soda. Have them put a spoon full or drop of the ingredients of their choice in a cup. Encourage participants to combine ingredients that they think will taste good together.
- Add a splash of seltzer water. Remind them to only use a little bit of each, in case their soda is "gross." One drop of extracts and oil is more than sufficient.
- To try the homemade cola, mix 4 teaspoons of syrup with 2 ounces of seltzer.

Our Fabulous Five Senses!
Two Are Better Than One: Demonstrate why we need two eyes and two ears. (Sight and Sound) (p. 89)
What You Need
What You Do (Eyes)
What You Do (Ears)
There is also a HILARIOUS template for making a Super Silly Huge Ears Headband on page 91. It makes me very happy!
Two Are Better Than One: Demonstrate why we need two eyes and two ears. (Sight and Sound) (p. 89)
What You Need
- Enough balls, bean bags, or other catchable items that each pair of children can have one
- Enough blindfolds or eye patches that each pair of children can have one
What You Do (Eyes)
- Have children pair up and give each pair a ball for a simple game of catch, standing about 20 feet apart. Have them toss the ball back and forth and keep track of how many times each catches it.
- Now, give each pair of children a blindfold or eye patch and have them use it to cover one eye. (In a pinch, you can tape construction paper to their faces!) Repeat the game.
- Do they catch more using both eyes. or just one? Is it easier with both eyes?
- Without binary vision, we lack depth perception to tell us exactly how far the ball is from us.
What You Do (Ears)
- Form a circle and choose a child to be the listener.
- Bring that child to the center and put on a blindfold. He or she will use a hand to cover one ear completely.
- As you point to random children around the circle one at a time, they will clap their hands twice.
- The child in the center will try to locate the sound and point to the clapper. Its tricky!
- After a few tries, have the child try again with both ears uncovered.
- Let several children experience this.
- Explain that one ear alone can recognize a sound, but it takes both working together to tell us where the sound comes from and how far away it is.
There is also a HILARIOUS template for making a Super Silly Huge Ears Headband on page 91. It makes me very happy!
*No Smell? No Taste! (Taste and Smell)
What You Need
What You Need
- Lifesavers, or other flavored candies (preferably something the kids are familiar with)
- Enough blindfolds that each pair of children have one
- Have students work in pairs. One student closes their eyes and holds their nose, while another feeds them a lifesaver, without telling them the flavor.
- The student should try to guess what flavor the life saver is, without letting go of their nose.
- Observations should proceed for a minute or so as the candy dissolves in their mouth. Is there any change in the taste of the candy from the beginning to the end of the experiment? Describe the tastes.
- Now have them taste the same flavor with their nose unplugged.
- Is it easier to discern the flavor? How does it differ from when their nose was plugged?
- Explanation of the science involved can be found here.
*Feel Your Way (Touch)
What You Need
What You Need
- Pack of balloons
- Various fillers: Rice, corn kernels, flour, flour and water mixture, water beads, sugar, lentils, cous cous, water, hair gel, bird seed, etc. etc.
- Clear Cups
- Fill balloons using a funnel and something to push it down into the balloon. For the liquids, you can use a ketchup bottle or squirt bottle, and for the dry materials you can use a funnel and straw. Tie off the balloons when filled.
- Do not over fill the balloons, as the children will be squishing and manipulating the balloons to try and figure out what is inside. With a regular sized balloon, only fill it enough to resemble an incandescent light bulb.
- Keep track of what material is in which colored balloon.
- Have the children work in teams to decide what is in each balloon.
- Record answers and see which team has the most correct. Offer a small prize to the winning team.
- Have a sample of each filler in clear cups so that the children can see what is in the balloons.
- For an extra challenge, have the children try to guess using only their feet. Or their faces. Or any other body part they are not used to manipulating, like elbows.
Craft: Thaumatrope (p. 91)
The instructions outlined in the manual teach you how to build a thaumatrope on a stick. You can also do it with two strings or rubber bands, or a bit of wire. Here is a set of instructions outlining how. If you've never seen a thaumatrope in action, watch the video below. It's animated, but the principle is the same.
The instructions outlined in the manual teach you how to build a thaumatrope on a stick. You can also do it with two strings or rubber bands, or a bit of wire. Here is a set of instructions outlining how. If you've never seen a thaumatrope in action, watch the video below. It's animated, but the principle is the same.
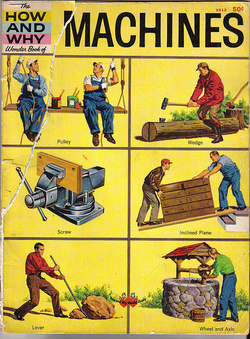
Simple Machines at Work and Play
You will need to collect an assortment of objects with which to construct your simple machines. You can use the examples in the manual, or come up with your own. However, I strongly recommend featuring at least the first part of the lever activity outlined in the draft manual, as the children will get a BIG kick out of picking you up! And just so you know they can, I found this for you online!
*Levers In Action (A lever is a bar that helps us lift heavy items by pivoting on a resting point called a fulcrum)
Have a child try to lift you -- or another staff member, but seriously...let them pick you up! -- a few inches off the ground unaided. Not likely! Now, place a 5 foot long wooden plank on a brick. The brick should be about 18" from one end of the plank. Have the same staff member (YOU!!) stand on the plank at the end nearest the brick. The same child will step onto the plank at the other end. Adjust the placement of the fulcrum (the brick) as needed until the child can easily lift you. Explain that changing where the fulcrum is along the lever, in relation the to person doing the work and the object being moved, changes how well it works. Let the kids try to pick up multiples of each other. There will be laughing.
*Inclined Plane
To be honest, I could not for the life of me visualize what the manual was trying to get me to do, so I found you this inclined plane activity instead. I like it better, because it doesn't complicate things by adding wheels.
*Pulleys (Pulleys help us do work by changing the direction of a force.)
The manual activity was OK, but then I found an activity about building your own crane online with some string, some tape, and a magnet and I had to show you. Because CRANE!!
Wedges (Wedges help us open things or move things apart)
Set a heavy book on a table. Have a volunteer try to get a grip on it to lift it using one hand. This is hard to do! Now have the volunteer slide the pointed edge of a triangular wedge (cut from heavy cardboard or wood) under the book. What happens? With the wedge in place, can you pick up the book with one hand? (Your front teeth are also a form of wedge. Point this out to the children later when they have snack!)
Secure it with Screws (Screws are really an inclined plane wrapped around a central rod. They're used to put things together easily and hold them securely)
Earlier in the day, use a nail to hammer two blocks of wood together. (You can do this in front of the kids as well, but I probably wouldn't let one of them do it.) Have a volunteer try to pull the blocks apart using their hands only. No luck! Now ask the kids if they know of a simple machine that may help. Use a flat head screwdriver, or another nail, as a wedge, hammering it between the blocks to separate them. When you have a decent gap between the two blocks, your volunteer should be able to pull them apart. Now have a volunteer try to push a screw into the wood to reconnect the blocks. Too hard, right? Use a screwdriver to demonstrate how much easier it is to join the blocks when you supplement your pushing force with the threads of the screw. (If you don't have a power screwdriver, have a pilot hole drilled in advance, or this will take FOREVER!) Again, have a volunteer try to separate the tightly connected blocks. Then try to separate them with the wedge. Does it work? The same threads that make the screw easier to push into the wood, also hold their place in the wood much more tightly.
*Snack
Invite the kids to "play with their food" by using it to make a model of at least one simple machine before they eat it. Serve, in bowls or plastic bags, some combination of the following: Double-Stuff Oreos, red licorice strings (the skinny ones), orange wedges, Twizzlers, graham crackers, sugar wafers, miniature doughnuts, pretzel rods, and marshmallows. Add a plastic knife or two for a little whittling.
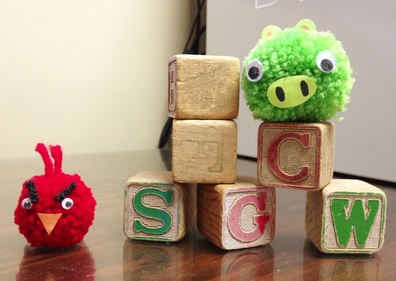
*Angry Birds Party
Kids love Angry Birds. And an Angry Birds Party is a great way to teach your kids about physics. There is even a web page dedicated to the science of Angry Birds! They also fit in quite nicely with the section on simple machines, so I thought I'd share some links, just in case your library wanted to help these poor birds avenge their eggs!
Angry Birds Party
Angry Birds Pig Puppet
How to Make a Yarn Pom Pom
Angry Birds Activities
From the Web
(Chapter 3 and Chapter 4 have a lot of cross over, but I tried to pick stuff that was more "why" oriented, than experimental.)
Tornado in a Bottle
Grossology Ideas
Soap Clouds
Strawplanes
Catapult
Candy Science
Marble Race Track
Earthquakes Lesson
Make Your Own Jellyfish in a Bottle
Paper Plate Marble Run
Rube Goldberg
